 Go to Makerobos
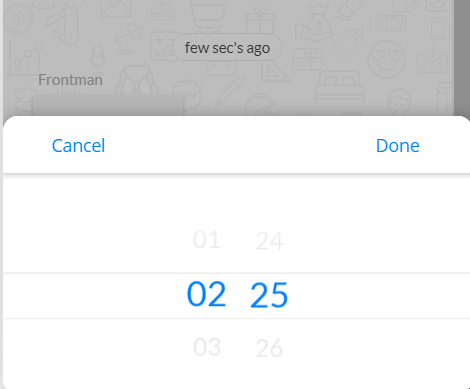
Organise events quickly and conversationally with your clients as per their time zone.
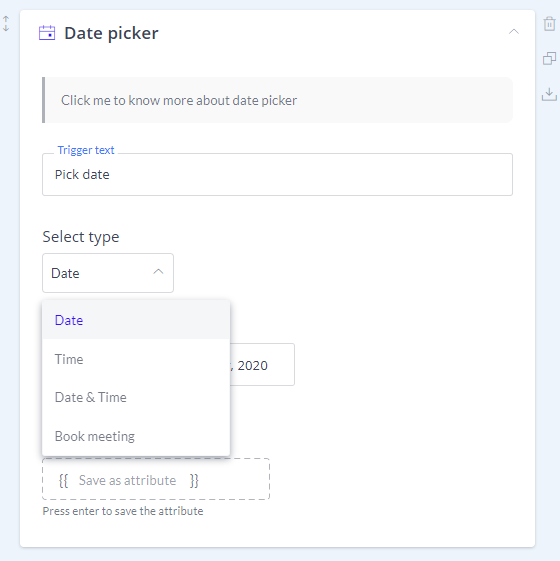
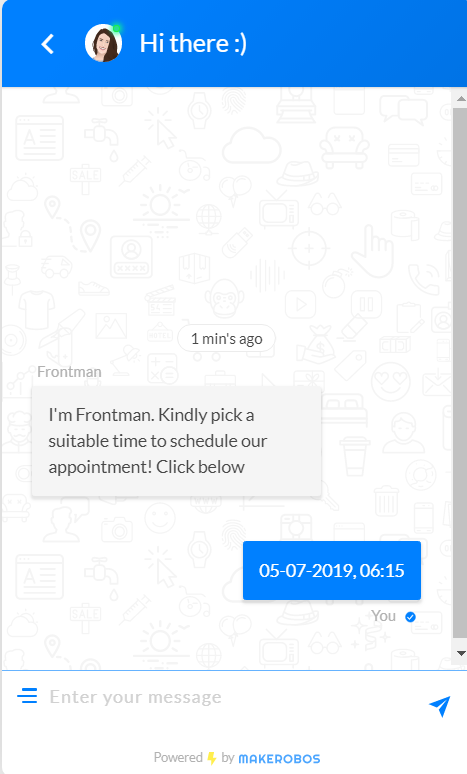
“Date picker” card lets you schedule an appointment with the website visitors within the conversational framework. A visitor needs to simply pick up the available date and/or time from the calendar, and voila appointment gets scheduled. Contrary to the concept of “Forms”, “Date picker” card conversationally confirms the details with the users, this, in turn, enhances the user experience.
Key Fields in Date Picker Card:
- Trigger text
- Select type
- Date
- Time
- Date and Time
- Book Meeting
- Change the activity span
- Time picker setting
- Additional settings
- Disable weekends
- Allow skip
- Current date
- Date rolling
1. Trigger Text:
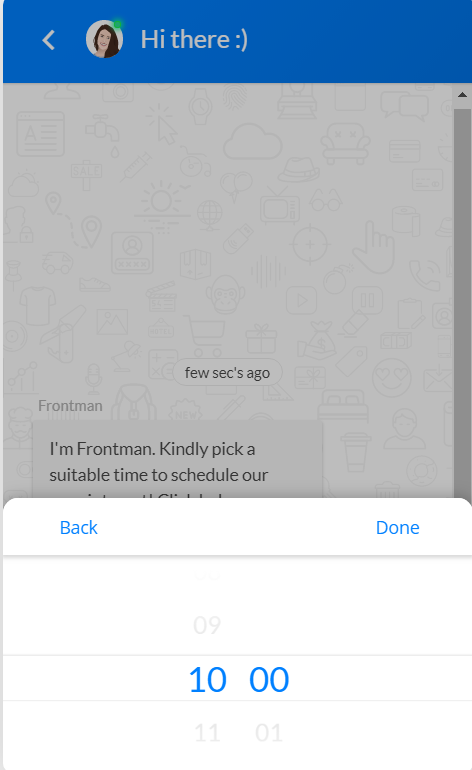
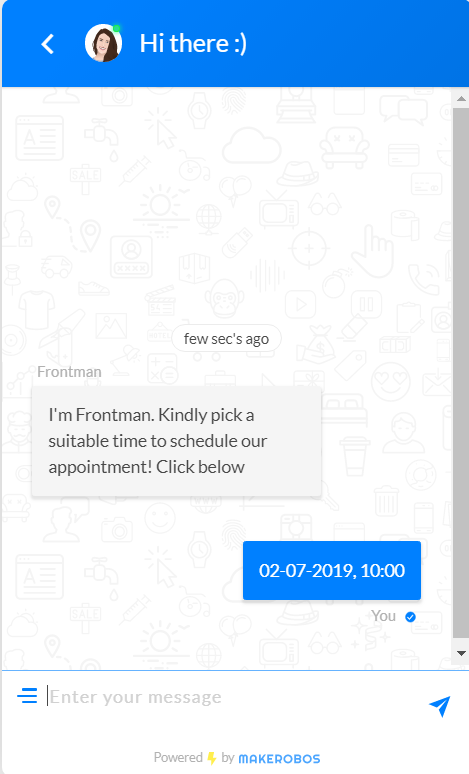
Enter a text and ask customers to pick a date and/or time. When one of the customers clicks on “Trigger text”, a calendar will scroll up to get input.

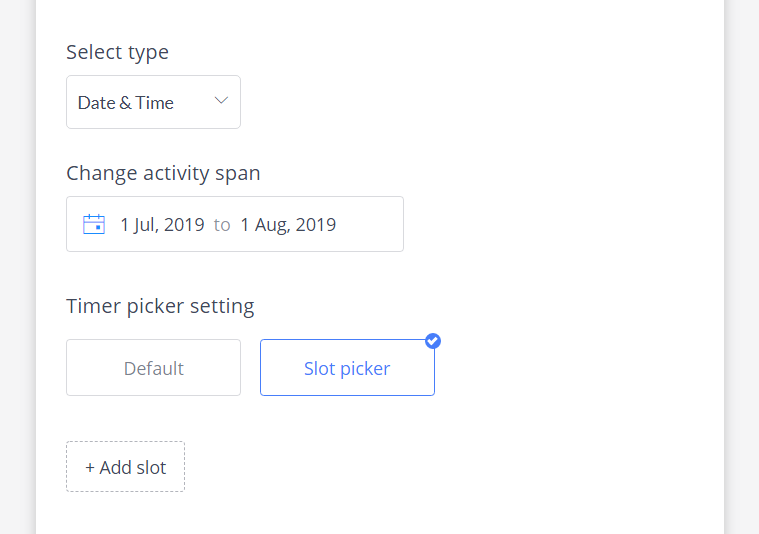
2. Select Type:
A. Date
Planning to trigger a day-full event? Then, you can assign “Date only”.
B. Time
Scheduling an event for the same /specific day? Then, you can set input type to “Time only”
C. Date and Time
You can also make use of both “Date and time” if you’re planning to run a specific day/week/month-long events.
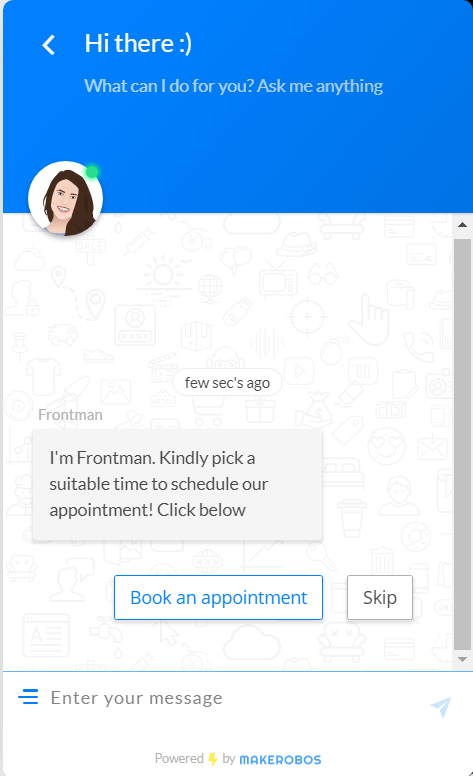
D. Book Meeting
This feature allows you to book instant meetings with your clients. At first, users will have to pick a date and time from calendar. Then detail page will be displayed to collect the participant’s name, email, and phone number. Participants can also add guest(s) and leave a note for host.
Note that the confirmed meeting details will be sent to the participant’s Google Calendar as a reminder.
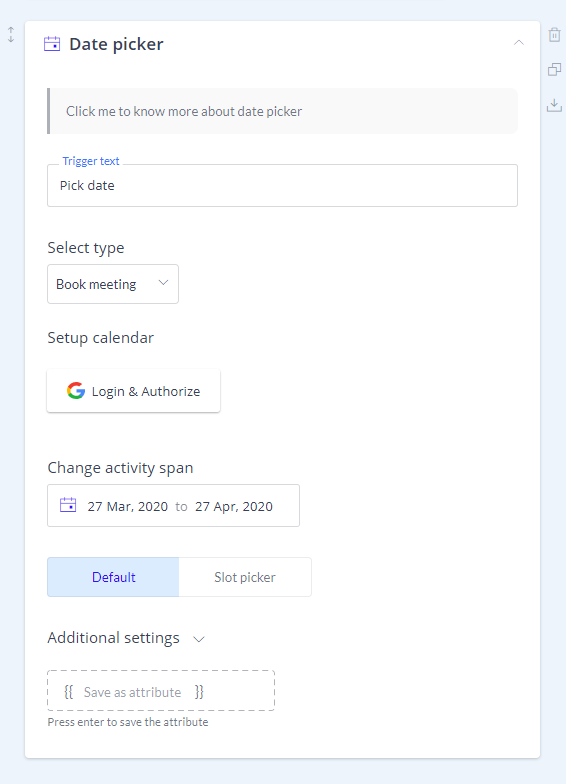
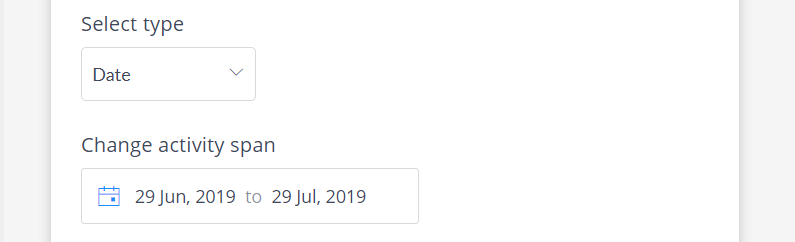
3. Change activity span:
This can be useful in case you want to offer meeting hours, not for a particular date and time. But, for weeks or months. You can arrange an event for any specific period of time. Simply pick two different dates from the calendar and click on ‘Apply’.

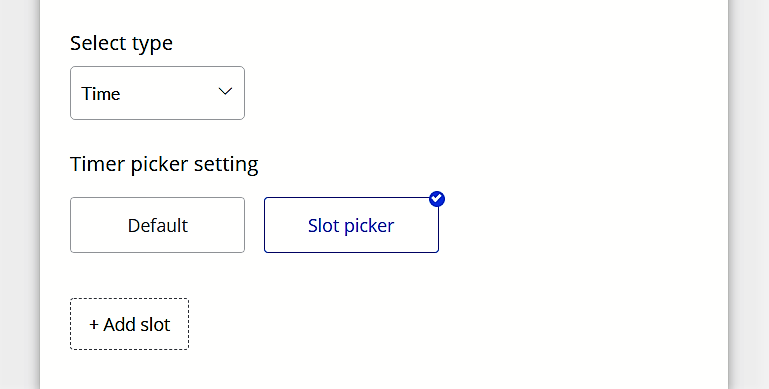
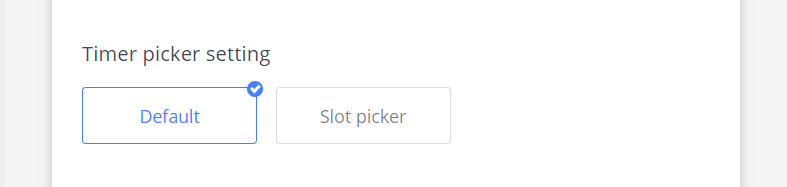
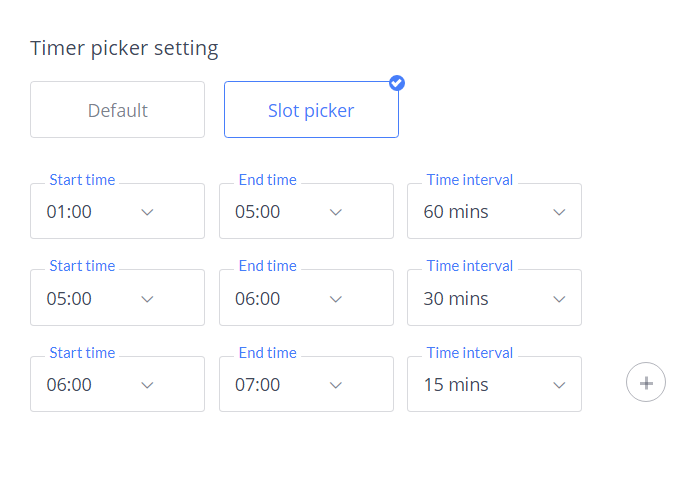
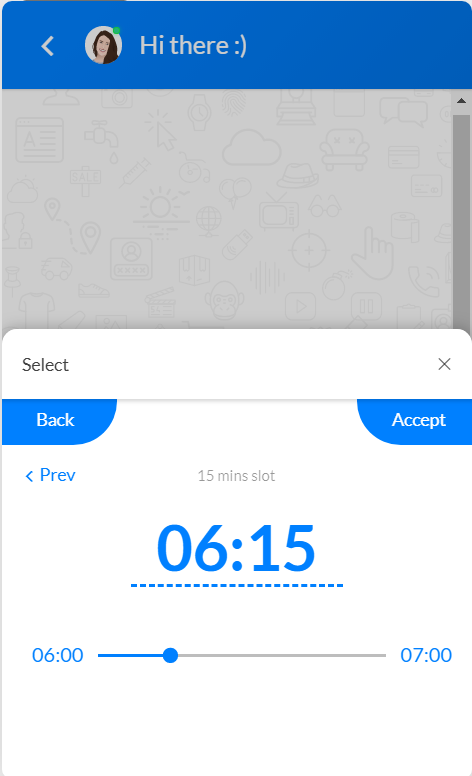
4. Time picker setting:
Sectioned into two formats, default and slot picker. You can choose to keep it in the default format, or in the “Slot picker” you can set a specific time slot as per your availability.
A. Default mode:
When “Set” to date and time format, default mode will work like this.

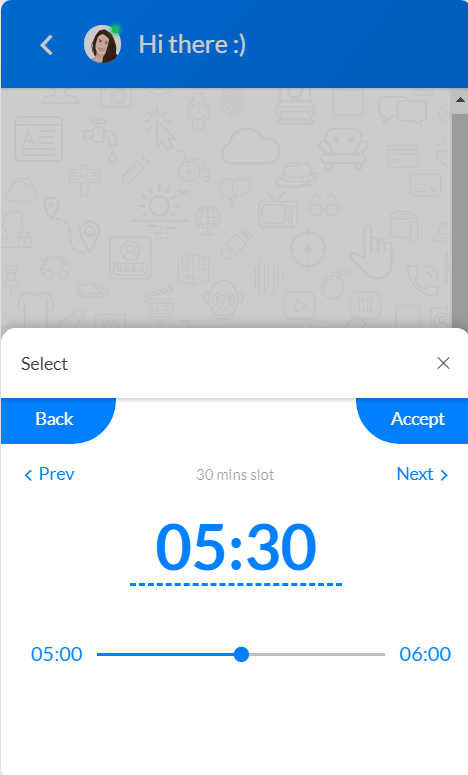
B. Slot picker:
It works with time, date and time functions only. Here, slots are divided into 1:00-5:00 (60 minutes each slot), 5:00-6:00 (30 minutes each slot), 6:00-7:00 (15 minutes each slot) .


5. Additional settings:
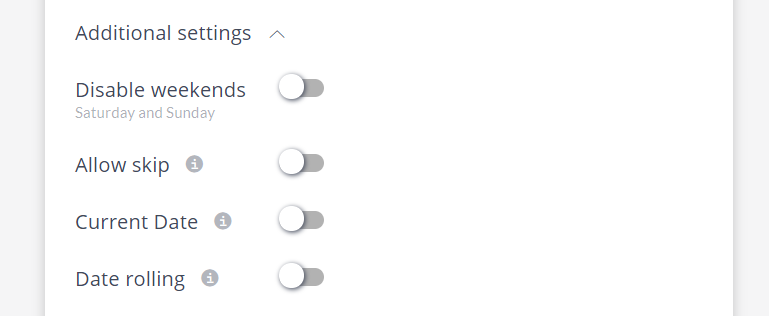
A. Disable weekends:
By enabling and disabling this feature, you can choose to skip/pick weekends in the calendar.
B. Allow skip:
Let visitors skip the “Time and date” card to continue to the conversation.
C. Current date:
Disable past days from the calendar, and begin an event from the current date.
D. Date rolling:
This feature adjusts the date forward automatically as the day changes, with respect to the selected calendar duration.
Save as attribute:
Record the user input in the form of an attribute.
How to fetch specific user details from the saved attributes?
For instance, if you have saved the user-selected date and time details in the {{choice}} attribute. And, you need to send only date or time to your sales team, or if you want to filter users details based on a specific date/time.
Then you can call it by using the attribute: {{choice_date}} for date, and {{choice_time}} for time only.
Note: You can read more about calling specific attributes in this article.
What are the Use Cases of Date Picker Feature?
Call an appointment right from the Frontman’s chat screen, and advance your customer relationship. Here are a few use cases of the “Date picker” feature, that will help you to understand its implementation.
Hospitality: Let your customer book a seat/hotel room/ trip/event with ease, without phone calls and forms.
Car dealers: Let your customers book a service, or schedule a test-drive within the chat window.
Hospitals: Make it easier for patients to schedule a meeting with specialists/doctors without filling forms, or waiting on a telephone line/queues.
Corporates: Schedule client meetings in just a few clicks.
Note:
– “Date picker” card can only be placed after text or image card*.
Makerobos Help Center
– Users can pick date or time as per their timezone.
