 Go to Makerobos
Save the multiple user details in different attributes and send the verified details to the concerned team in real-time by using SMS or Email cards.
User Input card is here to assist businesses to get verified user-details. Using this card, you can take multiple inputs from website visitors, such as name, email, location, contact number, and even KYC documents.
In this card, there are a number of validation methods and conditions that can be used as per the requirement. By taking advantage of the User Input card, businesses can generate real-time verified and genuine leads at any hour of the day.
You can verify the necessary user credentials and share the verified details to the relevant team instantly using SMS/Email card.
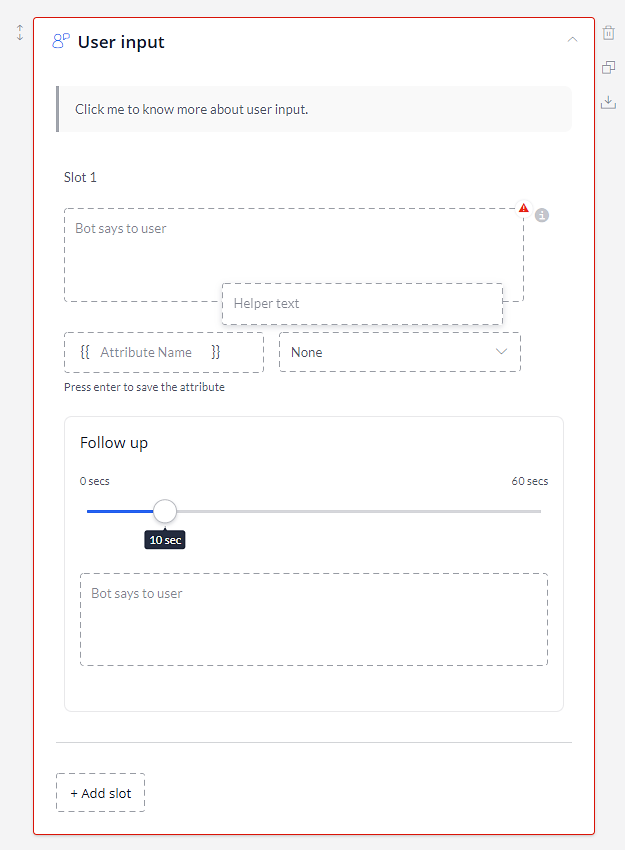
Understanding the User Input card:
- Bot says to user: Write the message that you want to send in order to get specific user details.
- Helper text: This text will be displayed in the input section.
- Attribute name: Save the user details in the form of an attribute. To save an attribute, hit enter after entering it.
- Validation: Select a validation method from the list to verify the important user details.
- Fallback message: This message will be sent to the users in case of entering invalid user details.
- Follow-up: You can choose to send a reminder message to the users after 0-60 seconds of their inactivity.
- Add slot: Add another user input slot within the same card. This can be helpful in getting multiple user details sequentially.
In the User Input card, there are a number of validation methods. Let us discuss them in brief:
- Multiple Options
- Number
- Text
- Location
- Upload
- OTP Verification
- Regular Expression
- Incoming Webhooks
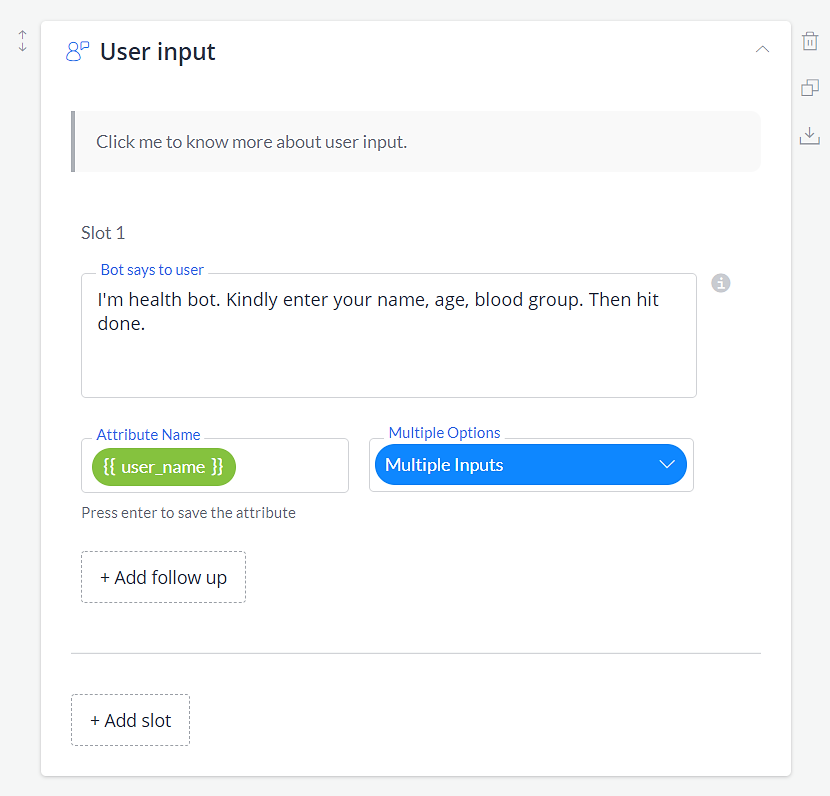
1. Multiple options:- Multiple inputs
Using this condition, you can take multiple inputs from the user and save them in the same attribute.
Frontman conversation:
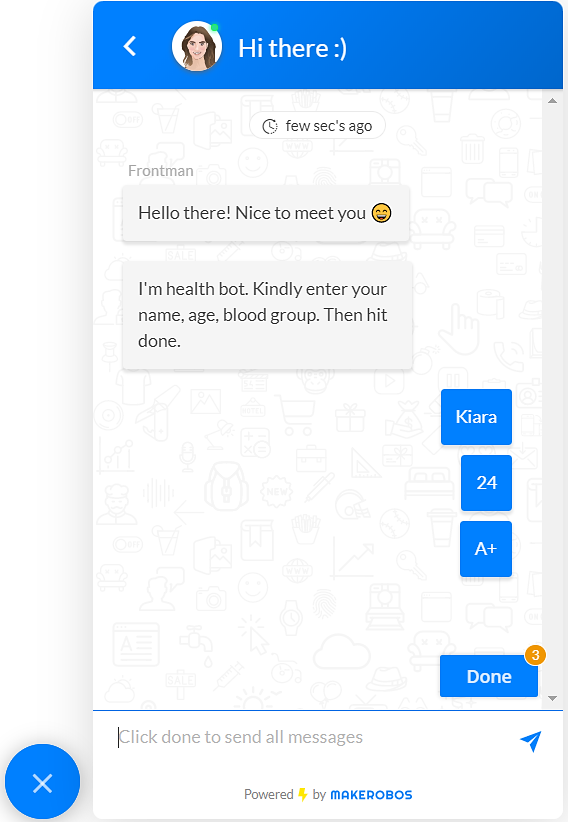
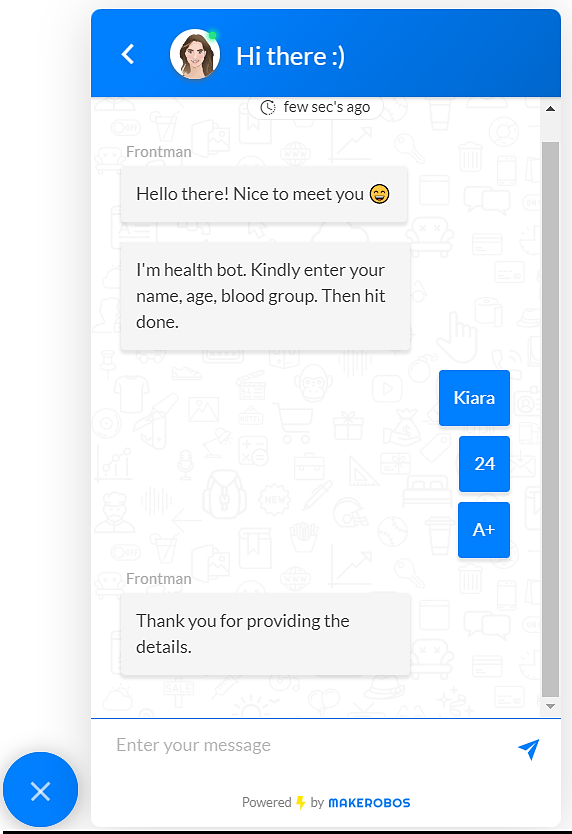
Note: When a user will click on the done button, all the user details will be sent and get saved in the same attribute.
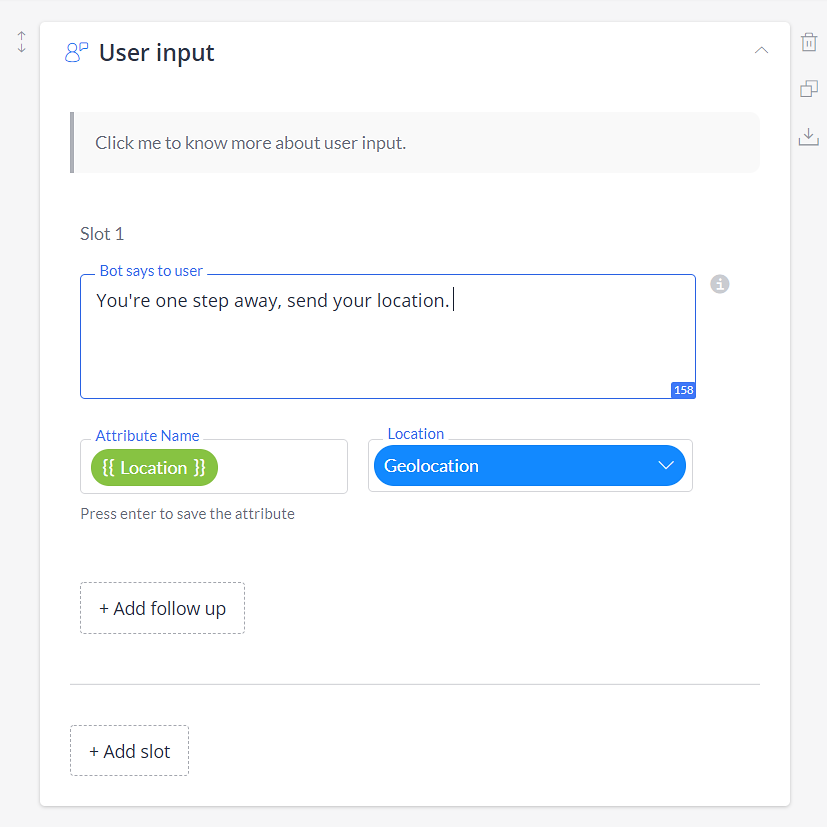
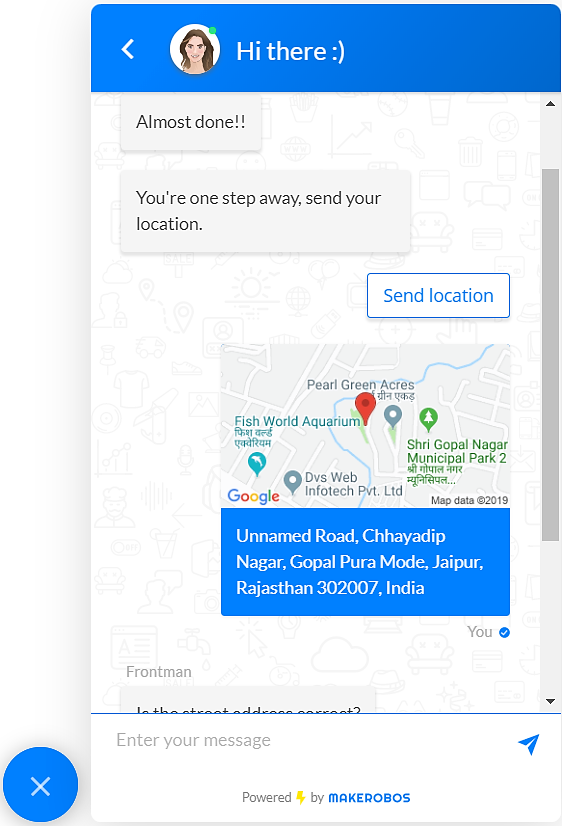
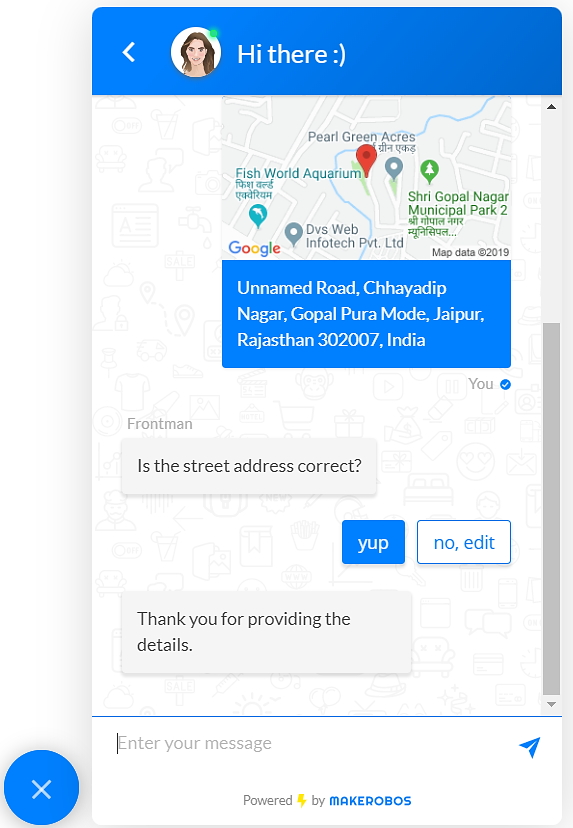
2. Location:- Geolocation
Using this validation method, you can get the exact geolocation of the users. This can be helpful in proceeding e-commerce, and other online orders. Or, you can also use visitors’ locations to tailor special conversation and target specific users.
Frontman conversation:
Get Specific location from Geolocation:
For example, if you have saved the complete user location (GPS based) in {{Geolocation}} attribute, then you can call specific geolocation details by using these attributes.
A) For country:
To filter out a user location on the basis of country, use this attribute {{Geolocation_country}}
B) For state:
To filter out a user location on the basis of the state, use this attribute {{Geolocation_state}}
C) For city:
To filter out a user location on the basis of the user’s city, use this attribute: {{Geolocation_city}}
D) For postcode:
To filter out a user location on the basis of the postcode, use this attribute: {{Geolocation_postcode}}
E) For street:
To filter out a user location on the basis of the user’s street, use this attribute: {{Geolocation_street}}
F) For map URL:
To fetch the map URL from the overall location details, use this attribute: {{Geolocation_mapurl}}
G) For map:
To fetch the map image from the {{Geolocation}} attribute, use this attribute: {{Geolocation_map}}
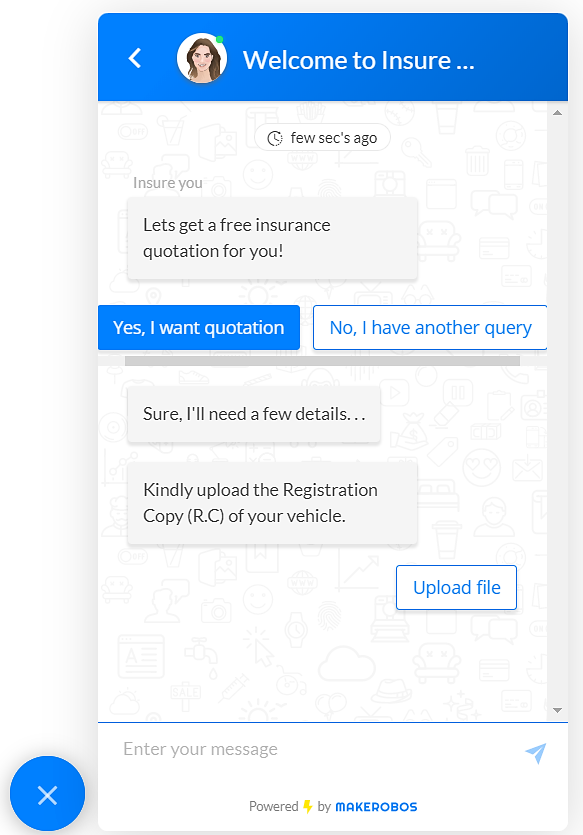
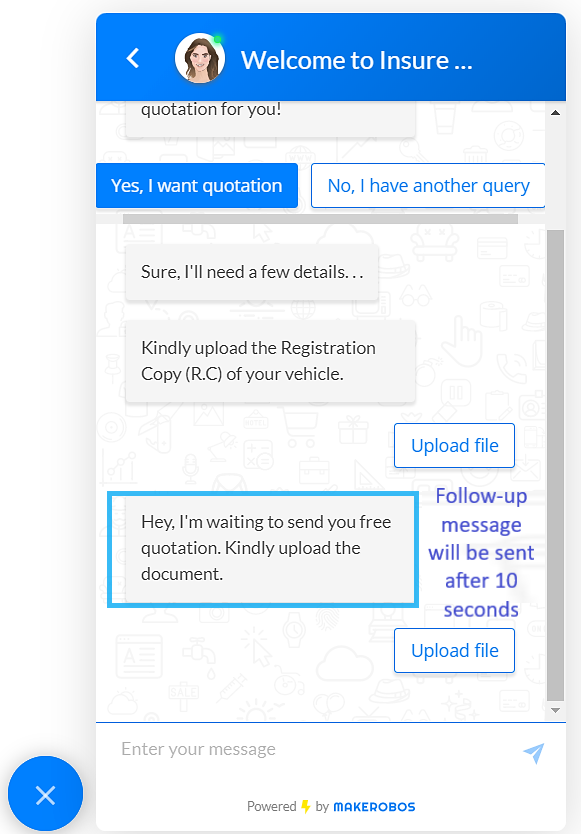
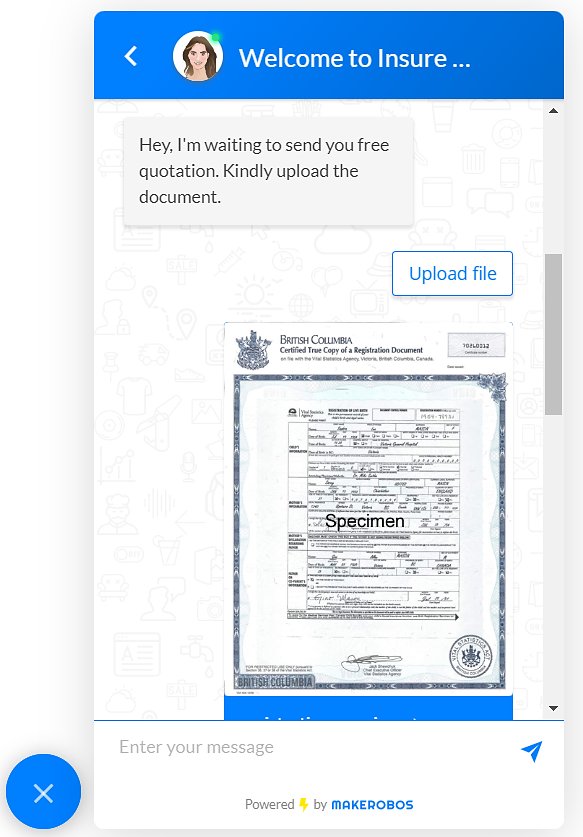
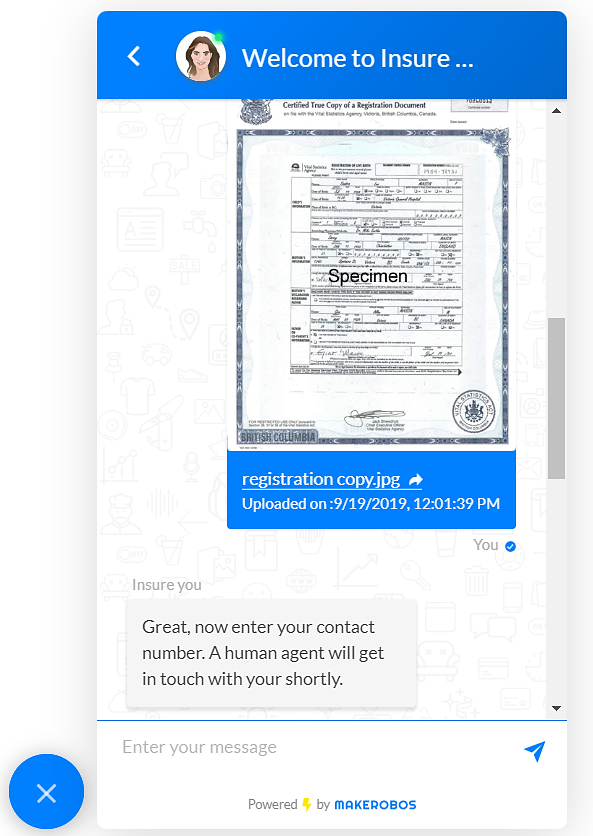
3. Upload:- File
This function can be used to take the user input in the form of image or video. For instance, it can be helpful in collecting KYC details of the users.
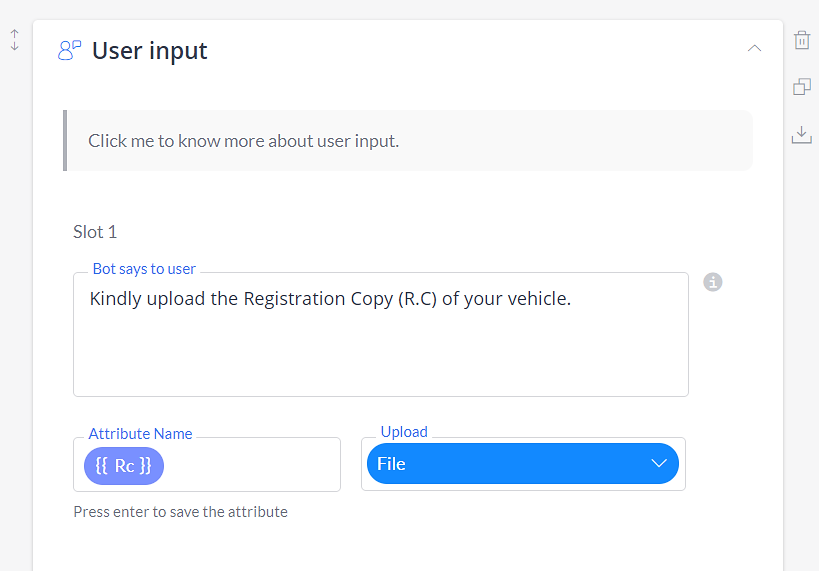
Here a follow-up message will be sent after 10 seconds to the user.
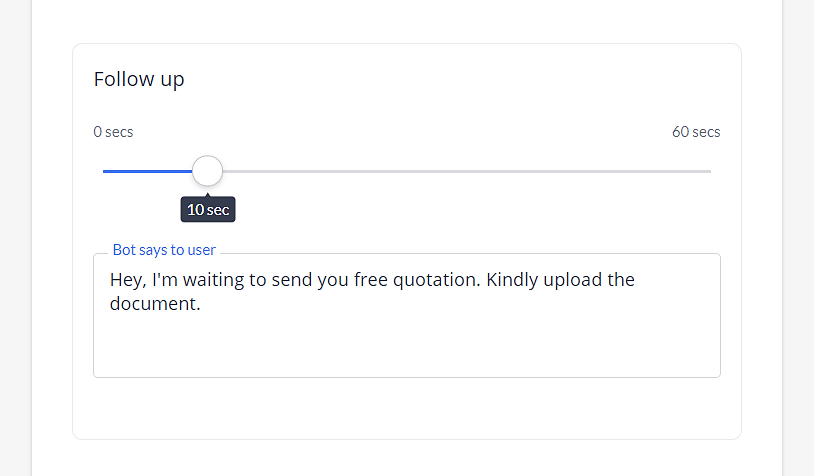
Frontman conversation:
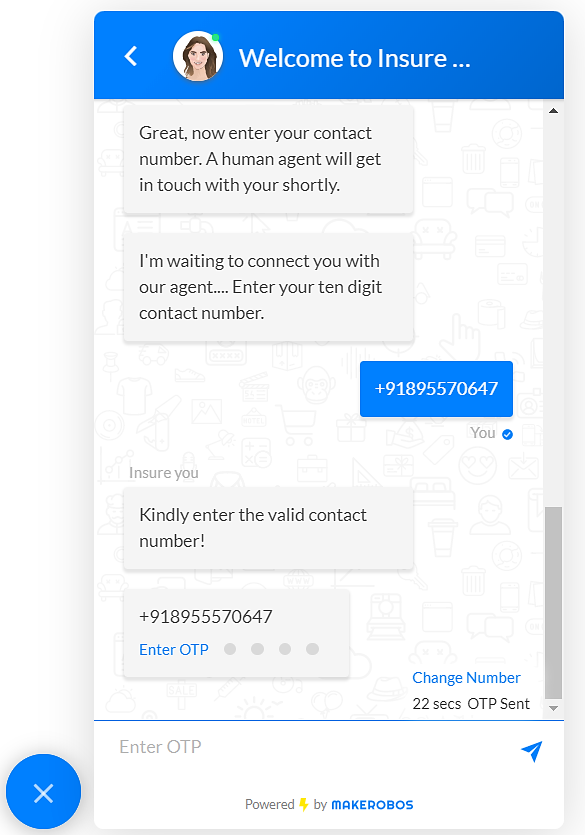
4. OTP verification:-
With the OTP verification validation function, you can either verify a user via Email or contact number, in a single slot. You should save the user details in different attributes to prevent overwriting of information.
A. Via phone number:
When authenticating a user via phone, a 4-digit OTP will be sent to the provided contact number. The users will be asked to enter the OTP in the text section to authenticate the details.
B. Via Email:
Just like the phone verification, a 4 digit OTP will be sent to the given Email address. After entering the correct OTP, the email will be verified and details will get saved into the corresponding attribute.
Note: To verify a user using both Email and phone, you have to create individual slots for both verification methods.
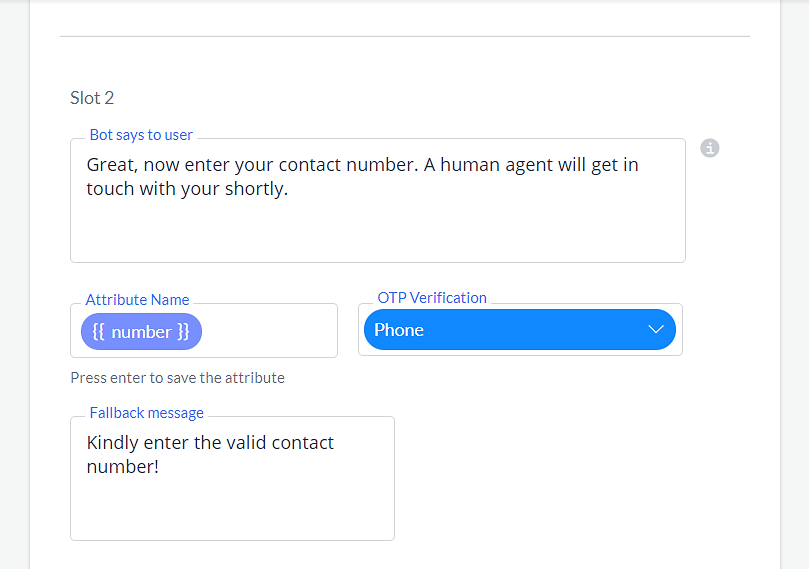
Note: In case, if a user enters the invalid contact number, then the fallback message will be displayed in the chat screen.
Here, a follow-up message will be sent after 10 seconds.
Frontman conversation:


5. Regular Expression
Define a condition (Matches, Not Matches, Contains, and Not Contains) then write the regex in the below section. You can also define a fallback message. It will be sent to users when their provided detail will not match with the above-defined regex. Note that, you can include up to three different fallback messages.
6. Incoming Webhooks
Take input from users and save them into CRM by defining the parameters via webhook function.
Makerobos Help Center
